Be More Than a Wannabe Part II
feature By: Ed Decker | June, 21


Now, to those shooters who have five shots all touching on the plumb line at 50 yards, and the front sight and rear sight are on zero, the bullet seems to be stable, so move forward to 100 yards. Those who haven’t accomplished this, if you sent me a photo of your groups and I have responded, then try what I suggested and let me know if it worked.
For those shooters moving to 100 yards, set up the same target at 100 yards, plumb the plumb line, make a larger aim point, and do the same as at 50 yards. Send me a photo of your groups if you wish.
There are several items I forgot to mention in my last article including care and maintenance of the rifle. All exposed or unexposed wood allows moisture to enter the stock and it can cause pressure that can change your zero. The best material to use is paraffin. To apply, melt it and quickly brush it into the wood grain, under the buttstock plate and barrel, and receiver cavity. You can also take a stick of paraffin and rub it in well and go over it with a hair dryer, wiping off the excess. The other detail is to keep all screws tightened. In more than one world championship competition, I have seen front sights become loose at the worst times. Use the proper Loctite if necessary; clean the threads with a degreaser before applying Loctite.

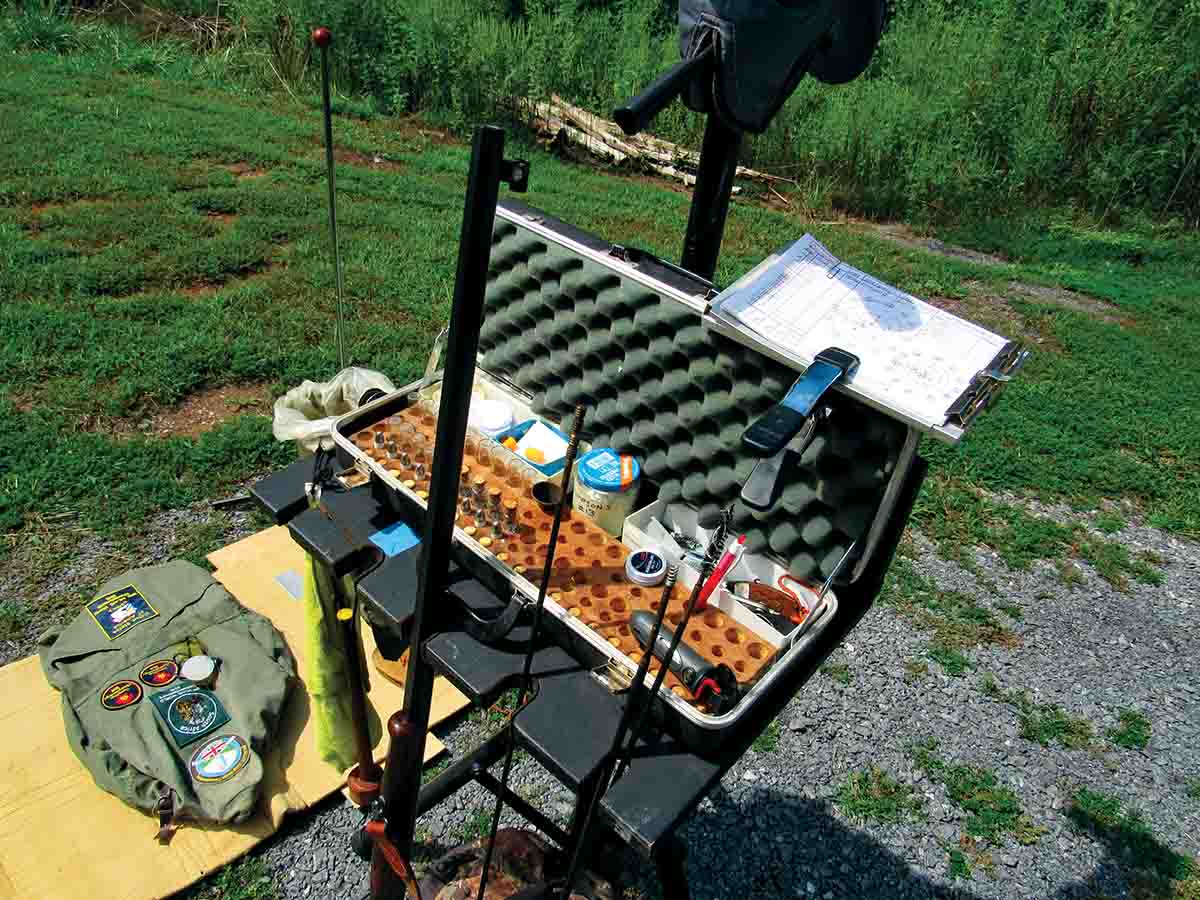
Now, in between shooting, get organized by making a kit for everything necessary when shooting long-range black powder. Create a space for these items: bullets, powder vials, short brass funnel, extra nipples, nipple wrench, nipple pick, caps, wet cleaning patches, dry cleaning patches, oil patches, ear plugs, card or felt wads, small pliers, pen or pencil, front sunshade, one pipe cleaner, CO2 charger, extra CO2, patch and bullet pullers.
In a separate bag or case, but handy to your shooting stand, keep the following items: shooting glove, score sheets, safety glasses, cheek rest, dirty patch container, stock butt rest, timer, extra front sight apertures, water, shooting hat, shooting jacket or shoulder pad, elbow and knee pads, small collection of tools, spotting scope and stand, wind flag, shooting stand or table, rain gear, folding stool or chair, walkie-talkie and cleaning supplies.
The photo below shows my shooting kit made from a scope case. My bullet organizer is a piece of foam with thin plywood glued on top to reduce weight. The shooting stand and scope, all fold up and will fit in a suitcase when you fly to a match. Always take your own shooting stand that is made windproof and waterproof, to all your matches. At this point you can get creative, from simple to elaborate, but the main thing is that it is lightweight and that it works.
All this sounds and looks like a lot of stuff and it is, but shooting a black-powder muzzleloader can be challenging and shooters must be prepared to handle any problem quickly, as the clock is running. It is essential to make a checklist to follow, even if only going to a range for practice.
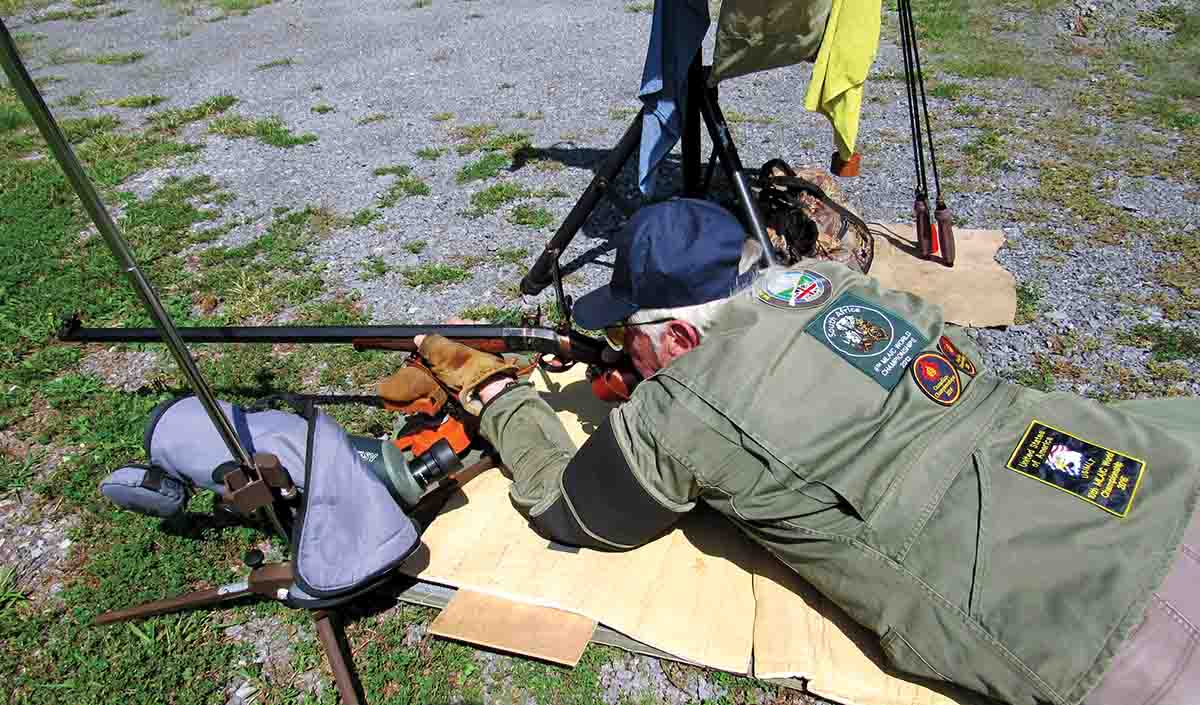
Let’s move forward. The rifle, sights, shooting stand and shooting kit are all in good order. Groups are tight and on the plumb line. Now, we will move from the bench to shooting prone with a wrist rest. I’d like shooters to get comfortable with a rest before we move to using the sling only.
In international competition, shooters can use anything for a rest, as long as only the wrist is on the rest. I use a cast aluminum rest that has spikes on the feet so I can adjust it easily. The other equipment for shooting prone is a good, comfortable mat with eyelets or loops so it can be staked down, a good spotting scope, shooting glove, ear protection, jacket, hat, and shooting glasses. Draw the leg (left or right) up to help open up the chest cavity for comfort and good breathing. When shooting prone with a rest or sling, shooters want to get into the habit of doing everything exactly the same, once you figure out what that needs to be – to include the position of the mat, “lay-down” scope, knees, elbows and the rest. When you settle into position, and your body is pointed directly toward your target, the body structure will make the shooter point the rifle toward the target. Adjust the angle of the body so it feels natural. Close the eyes and relax, then open the eyes. The direction of the rifle is the natural aim point. If not on the target, don’t muscle the rifle to where you want it. Take the time to move the body until the rifle is pointed dead-on the target. Shut your eyes and try again. If all is okay, come back up on your knees and lay down again. Position the rifle and it should be on target. Make note of where everything is so that it can be repeated in this good position each time.
As we go through this process, I will be explaining everything as per international rules. Every match has different rules, but I know some shooters are interested in competing internationally. If you want to compete internationally, shooters need to practice by their rules as much as possible. For example: Shooters can’t practice or compete in local matches shooting from cross sticks, then have to shoot “sling only” in an international match. If shooters really want to practice well, do it with no rest or sling, then when doing it from a rest or sling, you will feel very steady. Purchase a record keeping book and record every shot, even in practice.
In the next issue, I will discuss record keeping and its extreme value, and share the secret of winning as well as how and why it works. In the meantime, send those letters and shot group photos to me at onceuponatimetwo@gmail.com. Above all, have fun!


